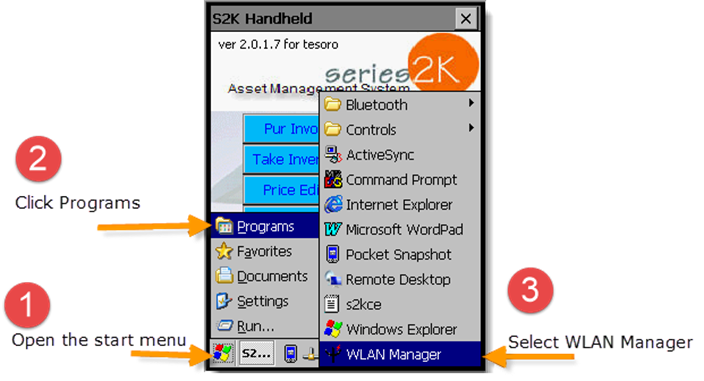
To connect your handheld scanner to your wireless network, follow the steps referenced in the picture below.
(1) click the small flag icon (Start button)
(2) click Programs
(3) click WLAN Manager
A prompt will pop-up when you open WLAN Manager. Read the prompt carefully.
If it asks to DISABLE Wireless LAN, click No.
If it asks to ENABLE Wireless LAN, click Yes.
It will then open the network utility to setup the wireless connection (pictured below).
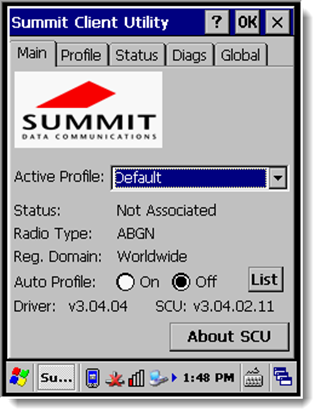
With the Summit Client Utility window open (pictured above) click the Profile tab at the top of the screen.
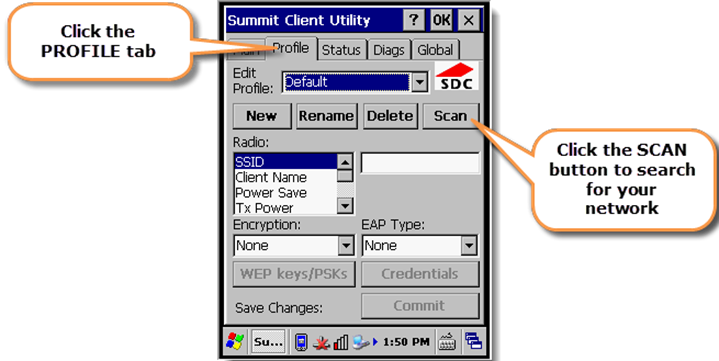
You will be directed to a new screen (pictured below).Click the Scan button to search for your wireless network.
When the scan is complete a list of all wireless networks found in the area will be displayed. Find your network in the provided list and click it to highlight it. Then click the configure button (pictured below).

Click Yes on the message that comes up prompting you to create a new profile.
You will be asked to provide the password to your wireless network. Enter your password and click OK. Then click the Commit button on the bottom of the screen to save the settings.
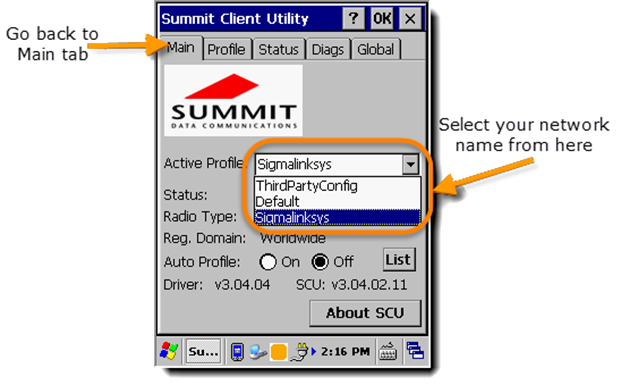
NEXT: (Follow the picture below) Go back to the Main tab at the top of the window. Select your network name in the "Active Profile" field.
Wait about 10 seconds to establish the connection.
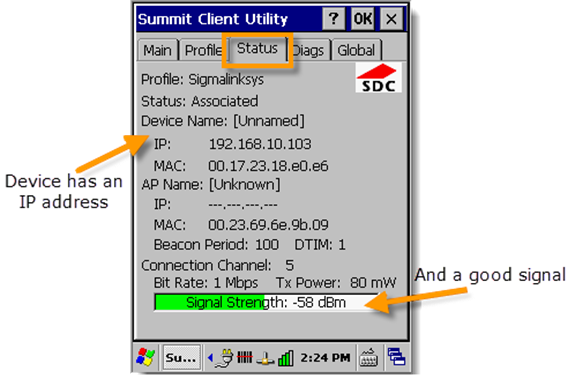
To verify a good connection, click the status tab at the top of the window.
This screen should display an IP address and signal strength if the connection was successful (pictured below).