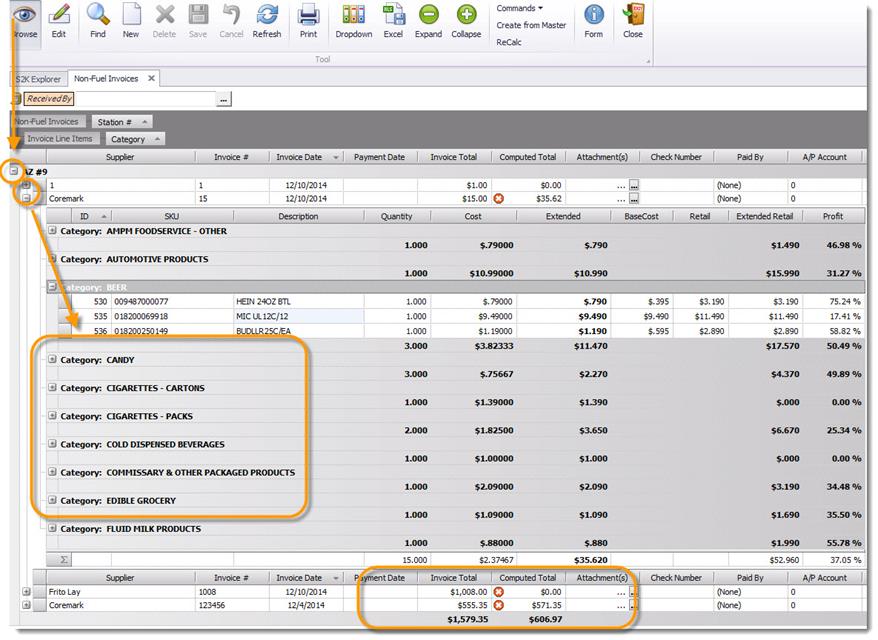
In the example pictured below these invoices were received via the “MailEDI” system.
In this example we have expanded one of the “+” so you can view the details without opening the actual invoice.
You can also edit basic invoice details by clicking on the EDIT button and changing and then saving.
The SAVE button does not become “live” till you have made a change and gone from the field you are editing.
How to Manage EDI Invoices
An EDI invoice is an invoice that loads into S2K automatically from a main grocery vendor, such as McLane, or Coremark.
EDI invoices are not entered at site level, but do still need to be checked for accuracy and pricing.
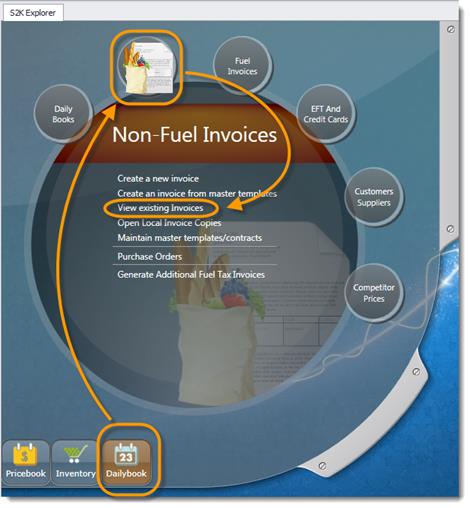
To begin, click the view existing invoices link from the daily book/non fuel invoice menu
The search window will open (pictured below).
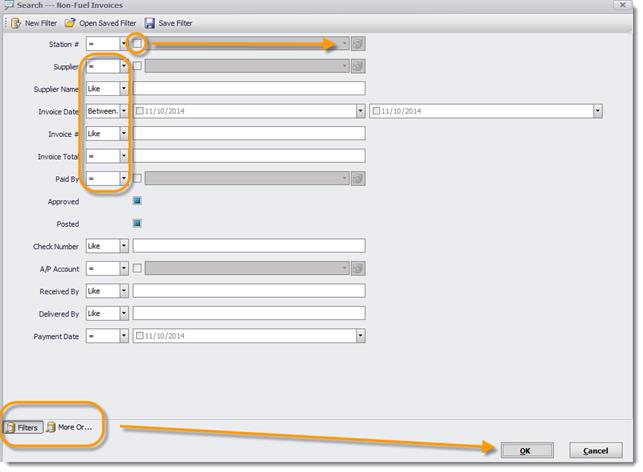
Select the station and vendor name from the search fields by clicking the box next to the field to activate and then using the dropdown arrows to select the name.
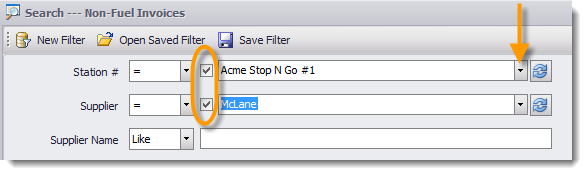
Click the OK button to search:
Click the plus (+) sign next to the station name to expand the list of invoices:
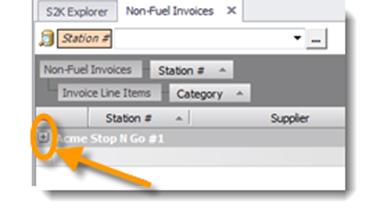
Then double click on the invoice number to open the invoice details
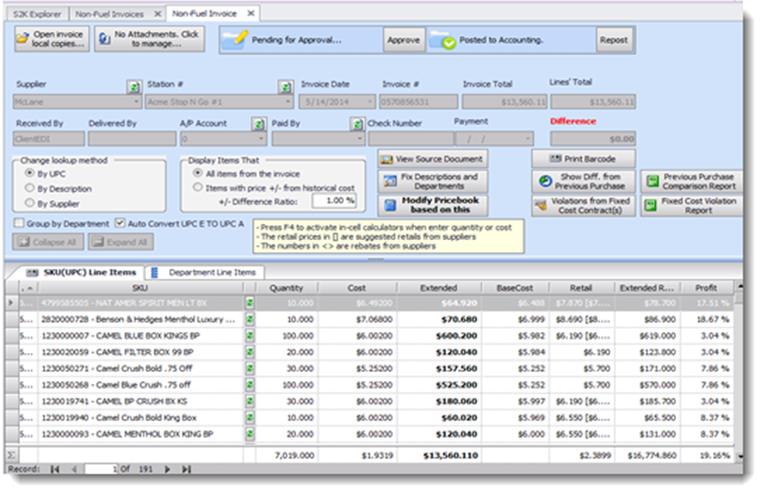
CHECKLIST: The following list of items should be checked on an EDI invoice:
1. CHECK NOT-SETUP ITEMS: One of the first things to do is to check the invoice for any new NOTSETUP items that may have imported. To do this simply click on the “Group by Department” box to sort the invoice by department. Then you will see the NOTSETUP items at the top of the list:

Then you can expand them to see the items. Then right click on the item and choose “View Item Details”:

A new tab will open with item detail page where you can choose the dept as needed and save.
Then use the MODIFY PRICEBOOK BASED ON THIS tool on your non fuel invoice to enter missing retails as needed. Or you can search for the items in your pricebook and edit as needed.
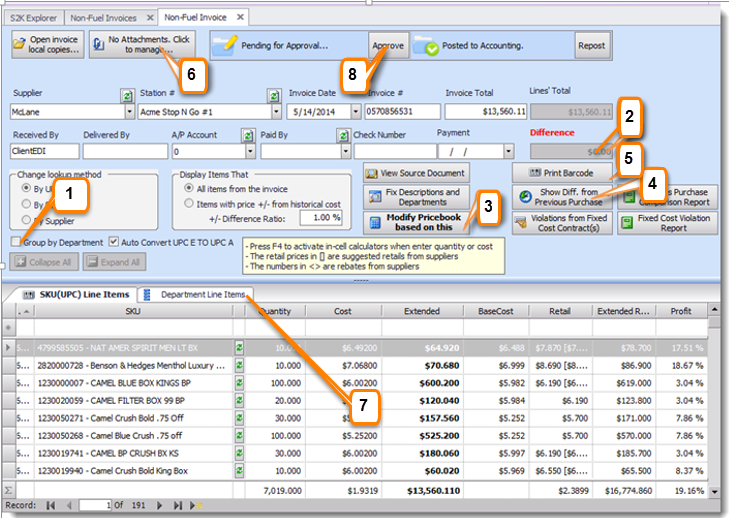
2. DIFFERENCE: This shows you the difference between your actual invoice Total and the Lines Total (all the details added up). Confirm that the Invoice total and Invoice line total match and that the difference field displays $0. Please note- If an invoice total does not match the line total, then compare the electronic copy of the invoice to the printed hard copy to locate the difference. Then let an S2K representative know the details, so they can work with the vendor to correct.
3. MODIFY PRICEBOOK BASED ON THIS INVOICE: Use the Modify Pricebook Based on this button to setup new items, check profit margin and assign/update retail figures to the POS
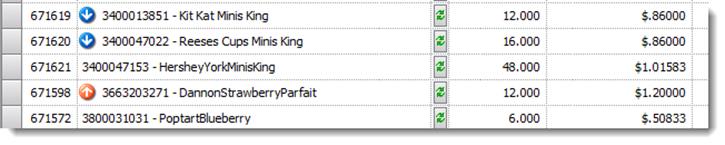
4. SHOW DIFF FROM PREVIOUS PURCHASE- To view cost changes from the previous purchase, click the show diff from previous purchase button. The system will show a red arrow up if the cost has increased since the last purchase, and a blue arrow down if the cost has decreased.
5. PRINT BARCODE- This allows you to print barcode labels for all the items on the invoice.
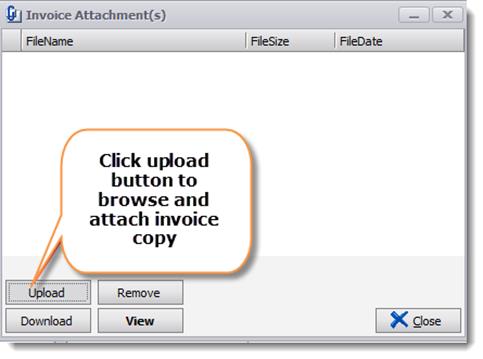
6. ATTACHMENTS, CLICK TO MANAGE- Use this button to attach a paper copy of the electronic invoice or delivery paperwork (optional).
7. UNCATEGORIZED EXPENSE- If you group your invoice by department, you can see any items that fall under the uncategorized expense department:

If you see a line item for this, it means that there were other expenses such as freight that need to be identified. You can either leave it as is, or you can delete it and enter a more detailed expense item to it under the department tab, such as RENT, FREIGHT or ADVERTISING as an example. This is especially important to do if you are posting to QuickBooks or S2k Accounting. There are 2 simple steps to take care of this.
a- First write down the amount and delete the line item from the SKU side. To do this go into EDIT mode, and click on the line item until it’s all darkened:

Then click the delete key on your keyboard. SAVE your changes.
b- Then you want to add the expense amount under DEPARTMENT LINE ITEM tab:

Then you can choose from the dropdown either a department or an expense item:

NOTE: Expense items are preloaded and are NOT available for SKUs but can be used in this department entry tab. They can also be custom mapped to the right accounts when using our QuickBooks integration module. The expenses that are available are:
Advertising & Promotion
ATM- Income Dept.
Computer Service Fees Dept.
Consumer Card Bounty Dept.
Credit Card Chargeback Dept.
Display Allowance – Alcohol
Display Allowance – Misc
Display Allowance – Soft Drinks
Display Allowance – Tobacco Dept.
Franchise Fees Dept
Freight
Interest Income Dpts.
Inventory Adjustment – Gas Dept
Inventory Adjustment – Store Dept.
Lock Box Dept.
Maintenance
Maintenance – Computer
Maintenance – Gas Equipment
Maintenance – Site Repairs Dept
Maintenance – Store Equipment
Network Fees
Rent
Royalty
Then enter the appropriate cost as needed to expense these items. Only enter a RETAIL if you are doing DEPARTMENT LEVEL inventory for that department, otherwise just TAB across and let the system auto enter the rest. You will notice that the total entered under this tab will add up into your Lines’ Total for balancing the invoice at the top of your screen.
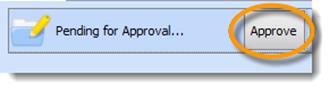
8. APPROVE- the last step is to approve the EDI invoice. When finished with the invoice, click the approve button and the invoice will be locked, so that no further changes can be made. If changes need to be made in the future, click the un-approve button, make changes, then approve again when finished.